How to add your business card to Apple & Google Wallet
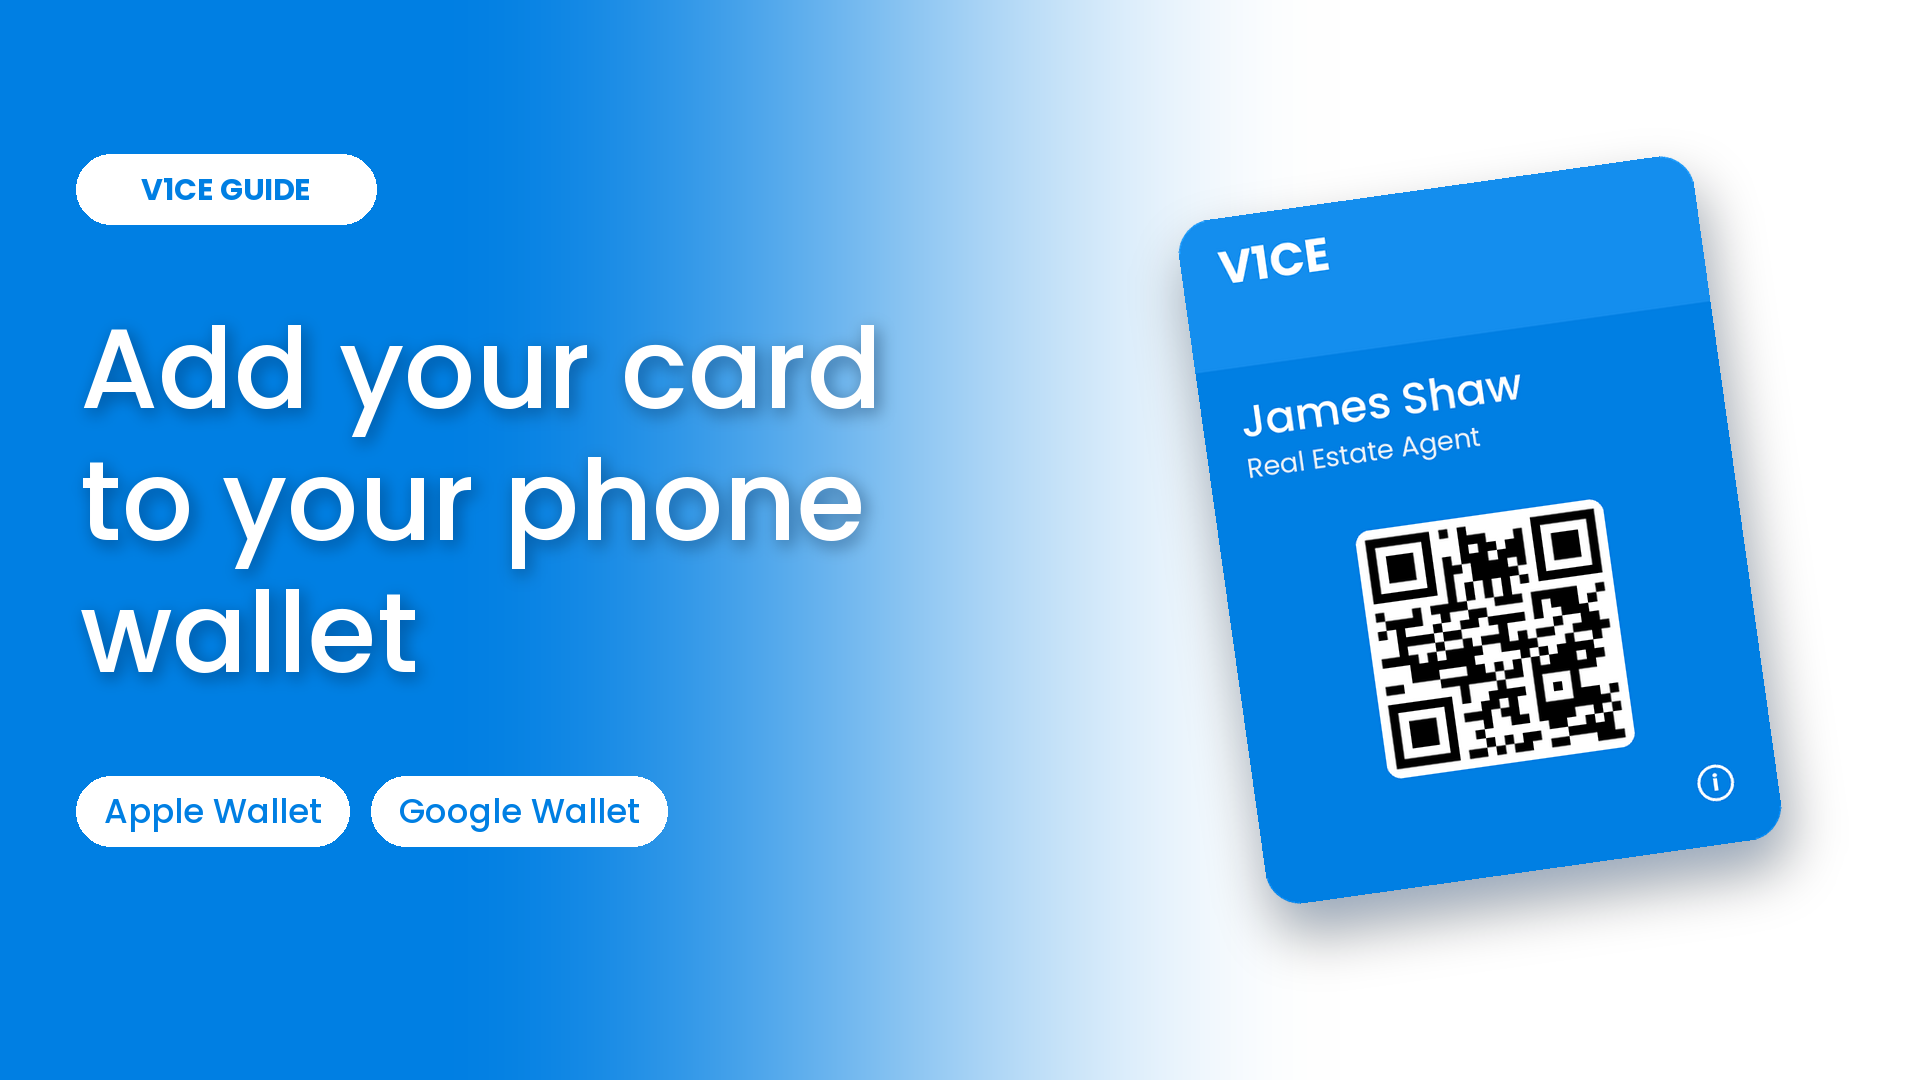
Your V1CE card can live in Apple Wallet or Google Wallet, right alongside your boarding passes and loyalty cards. Whenever you meet someone, you open your wallet and let them scan it, with no physical card to hand over.
They save your details, book time with you, or start a follow-up, and every scan works both ways: you share your details and you get theirs. Setting it up takes about a minute.
Watch the video
Open the wallet setup
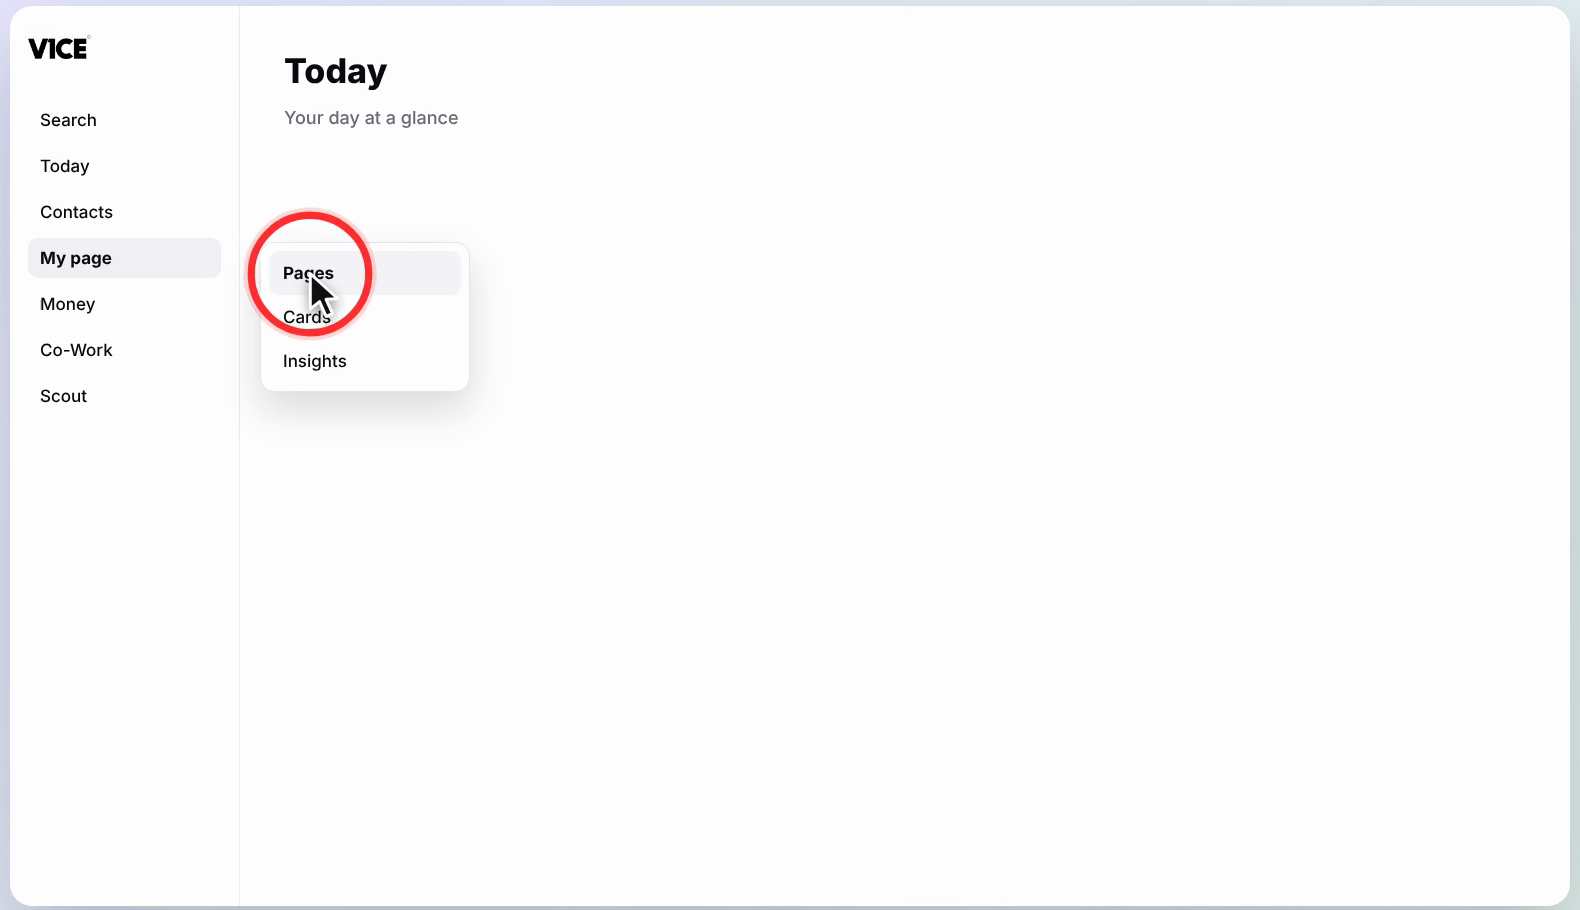
Step 1: Open My page
Select My page in the left menu, then choose Pages.
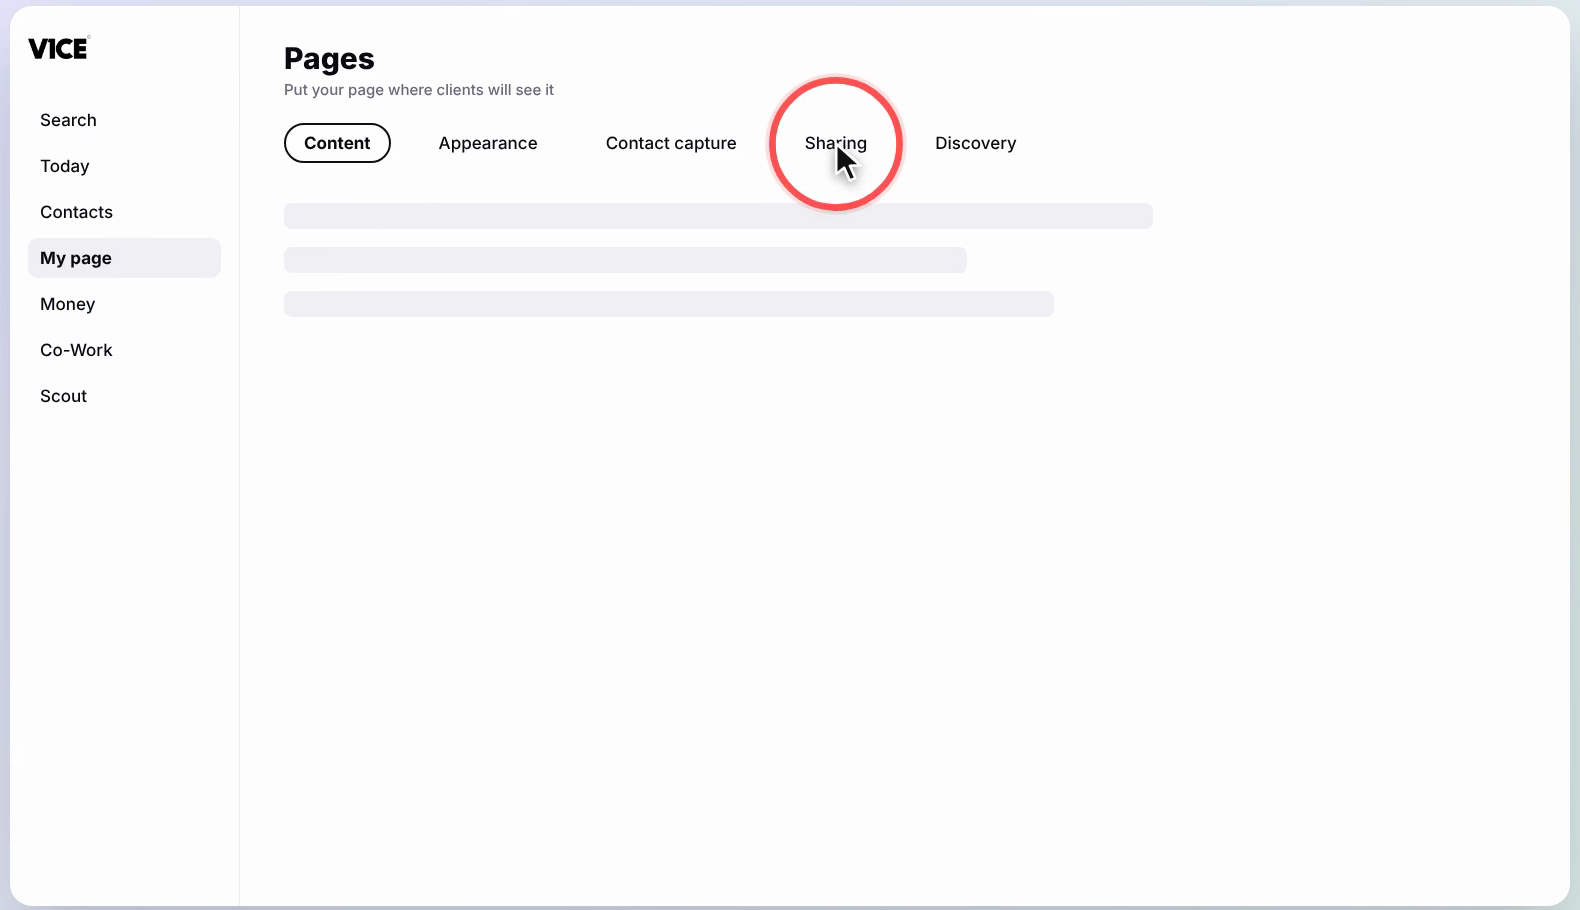
Step 2: Go to the Sharing tab
On the Pages screen, select the Sharing tab.
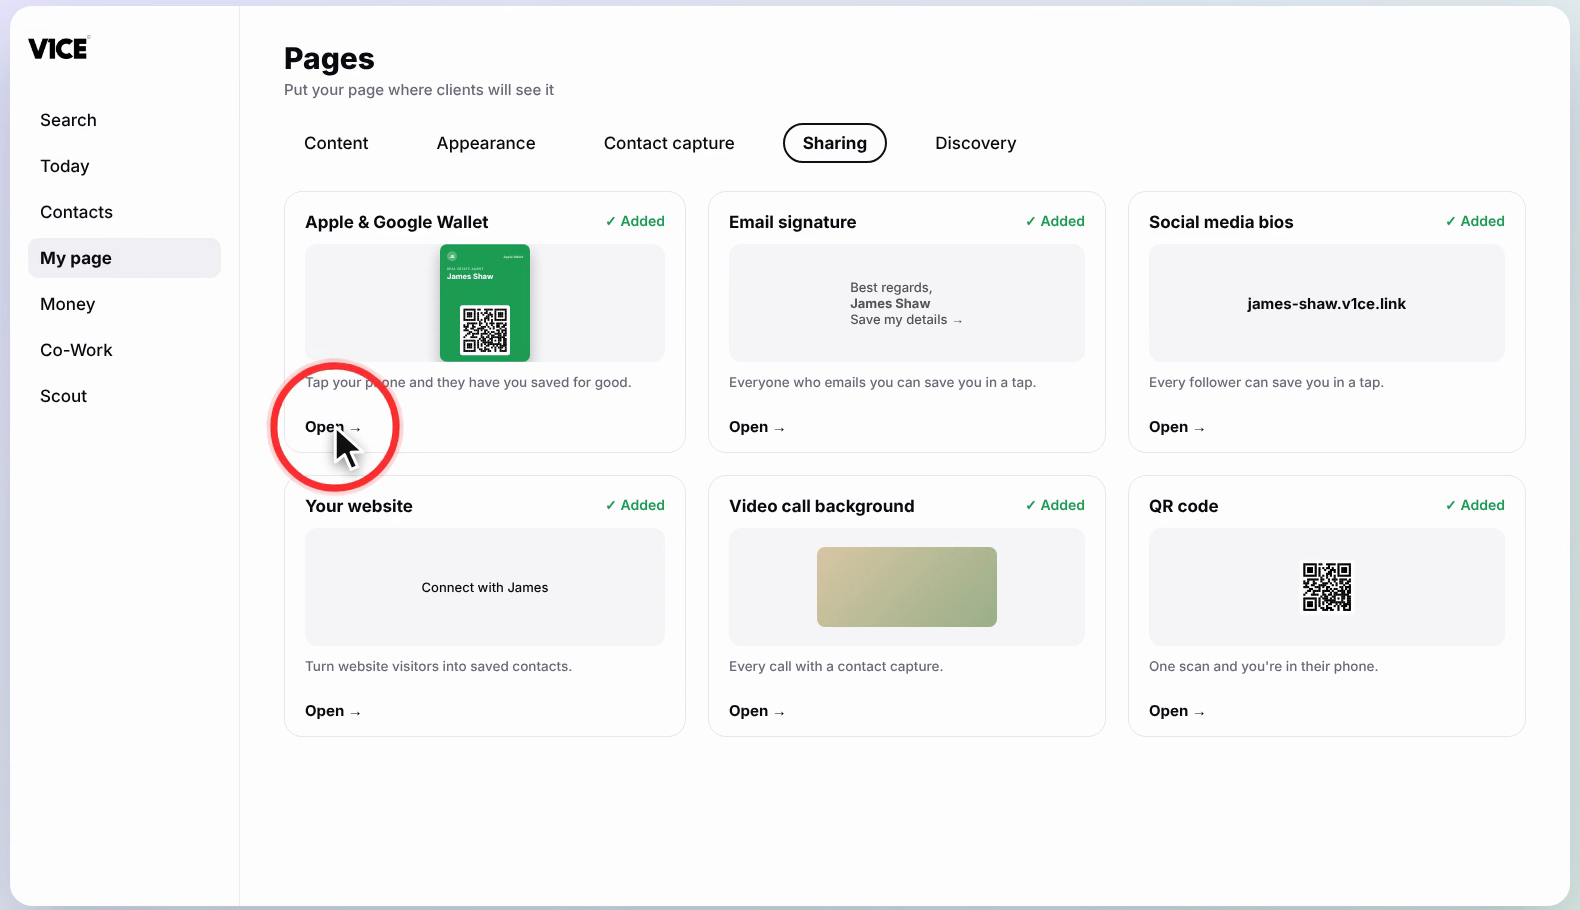
Step 3: Open Apple & Google Wallet
Select Open under Apple & Google Wallet.
Make the card yours
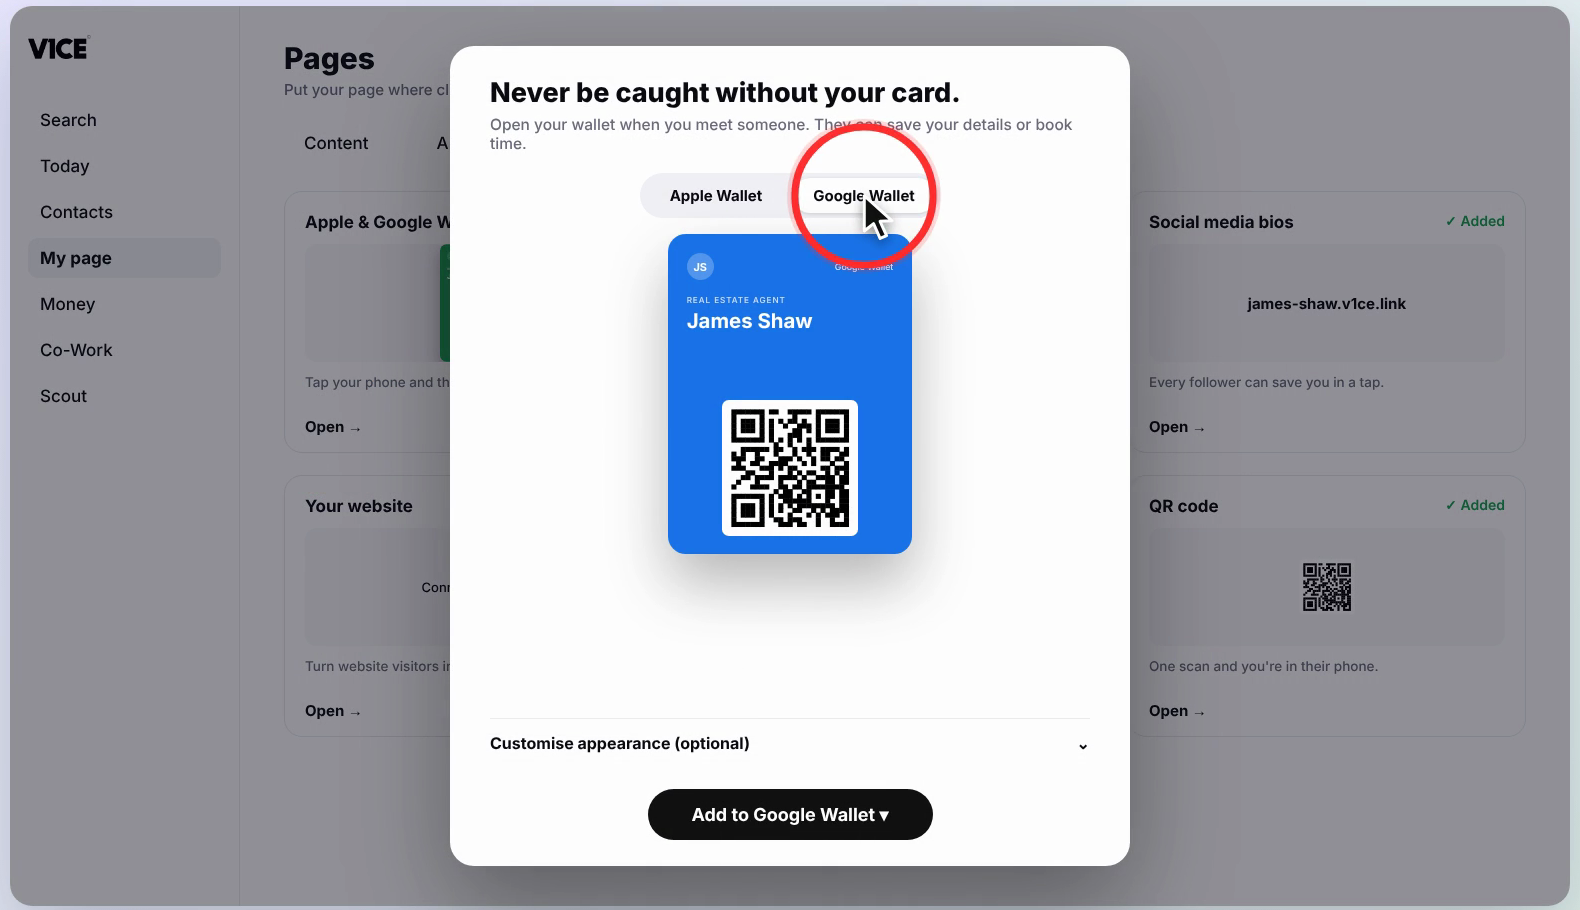
Step 4: Choose Apple Wallet or Google Wallet
Pick the wallet that matches your phone. Your card preview updates to match.
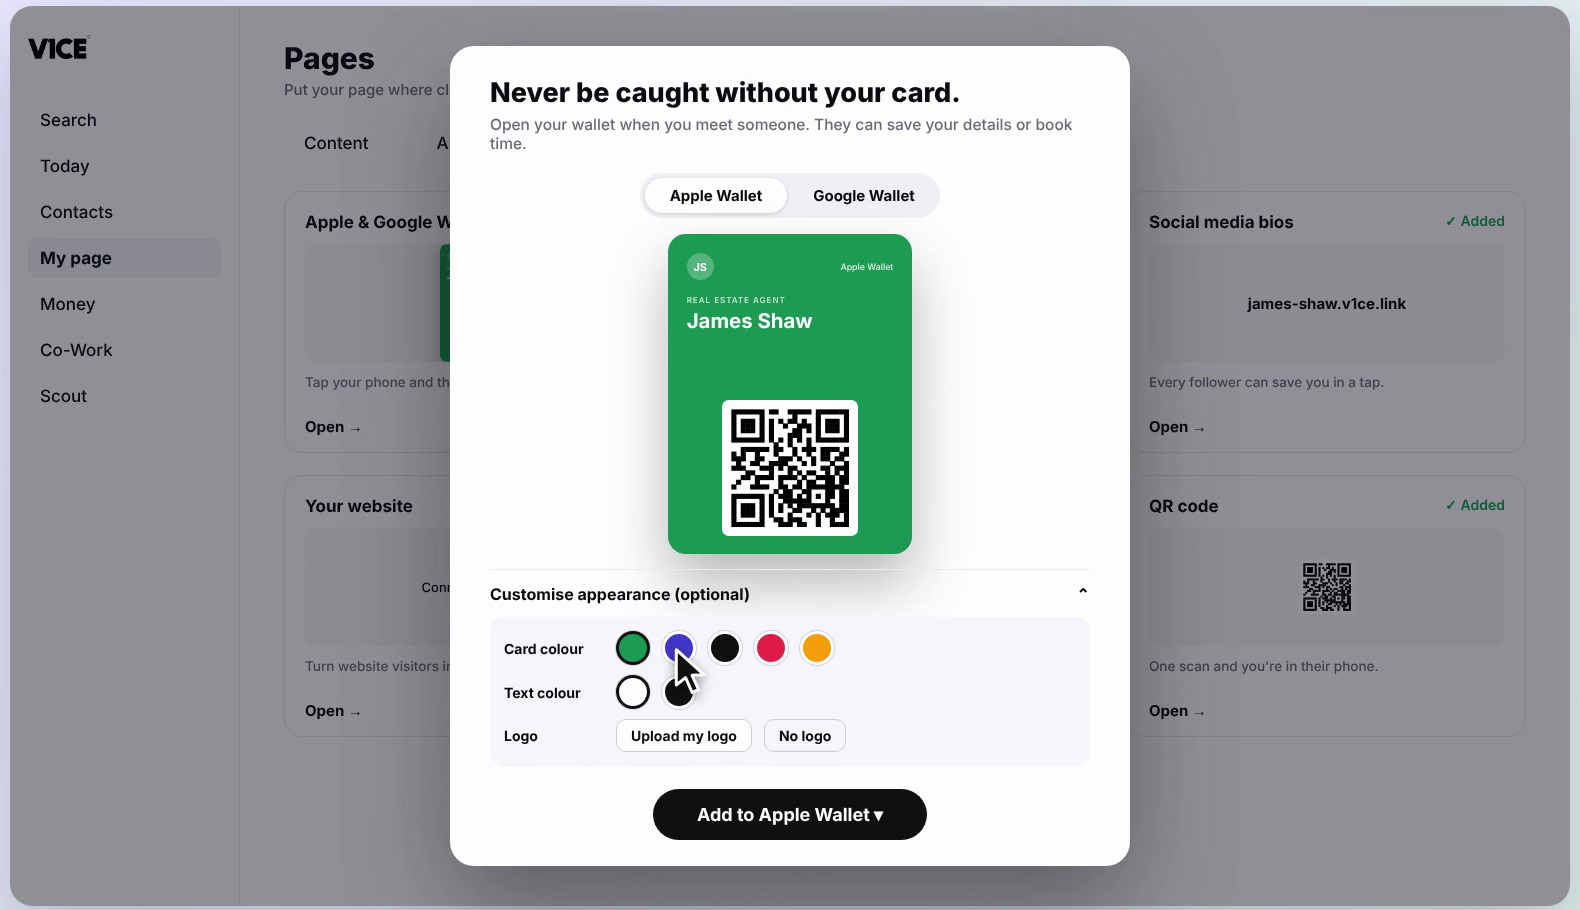
Step 5: Pick your colours
Open Customise appearance, then choose a card colour and a text colour to match your brand.
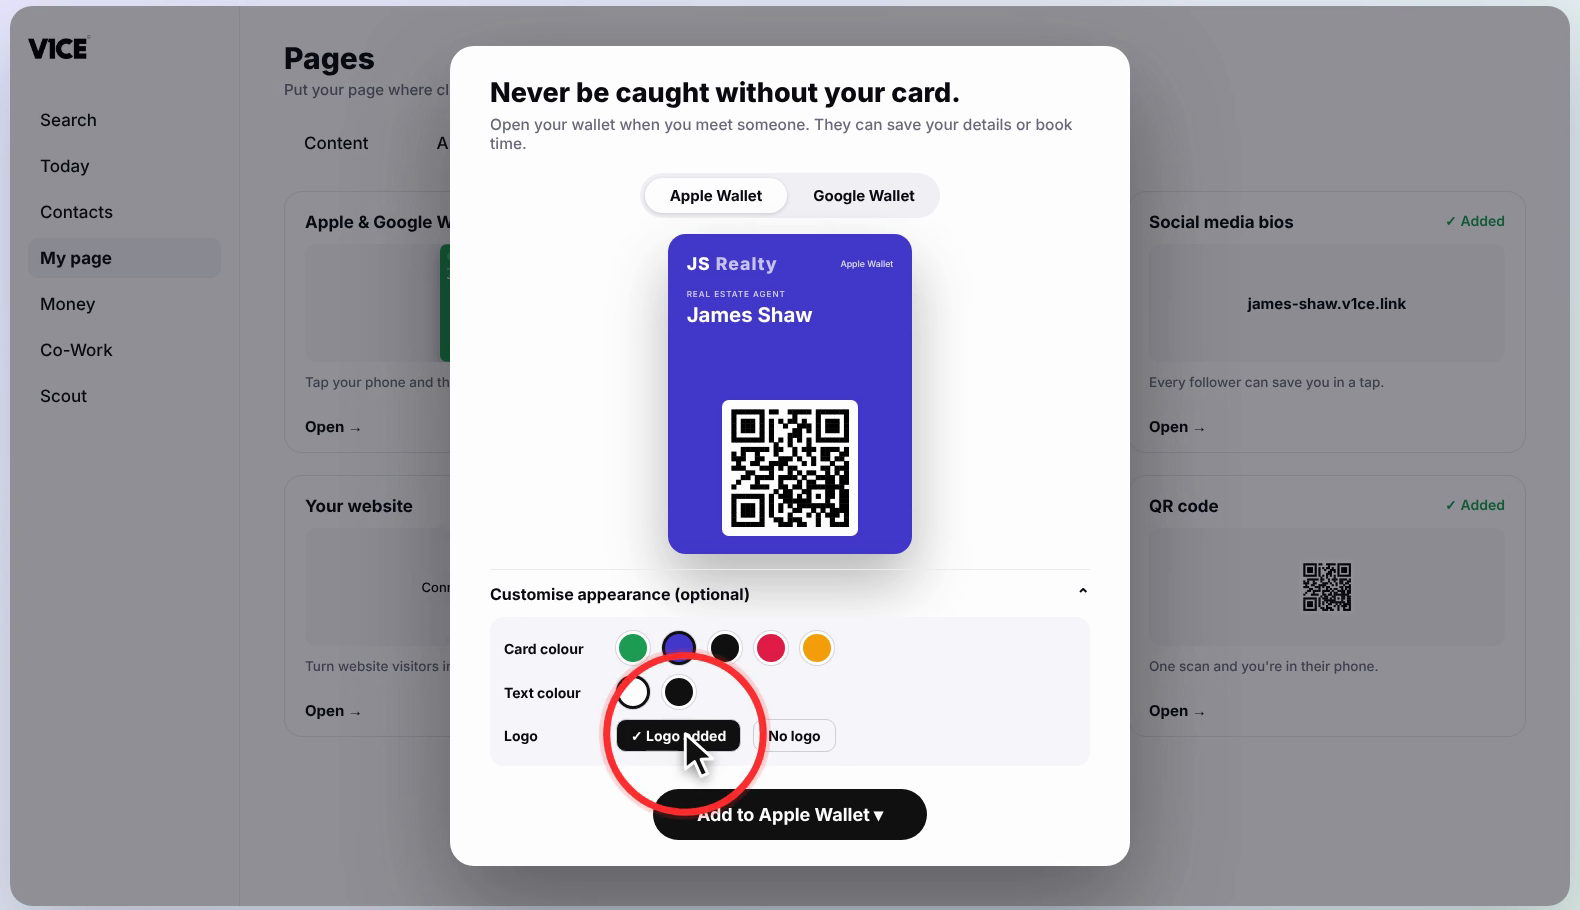
Step 6: Add your logo
Select Upload my logo to put your own logo on the card.
Add it to your phone
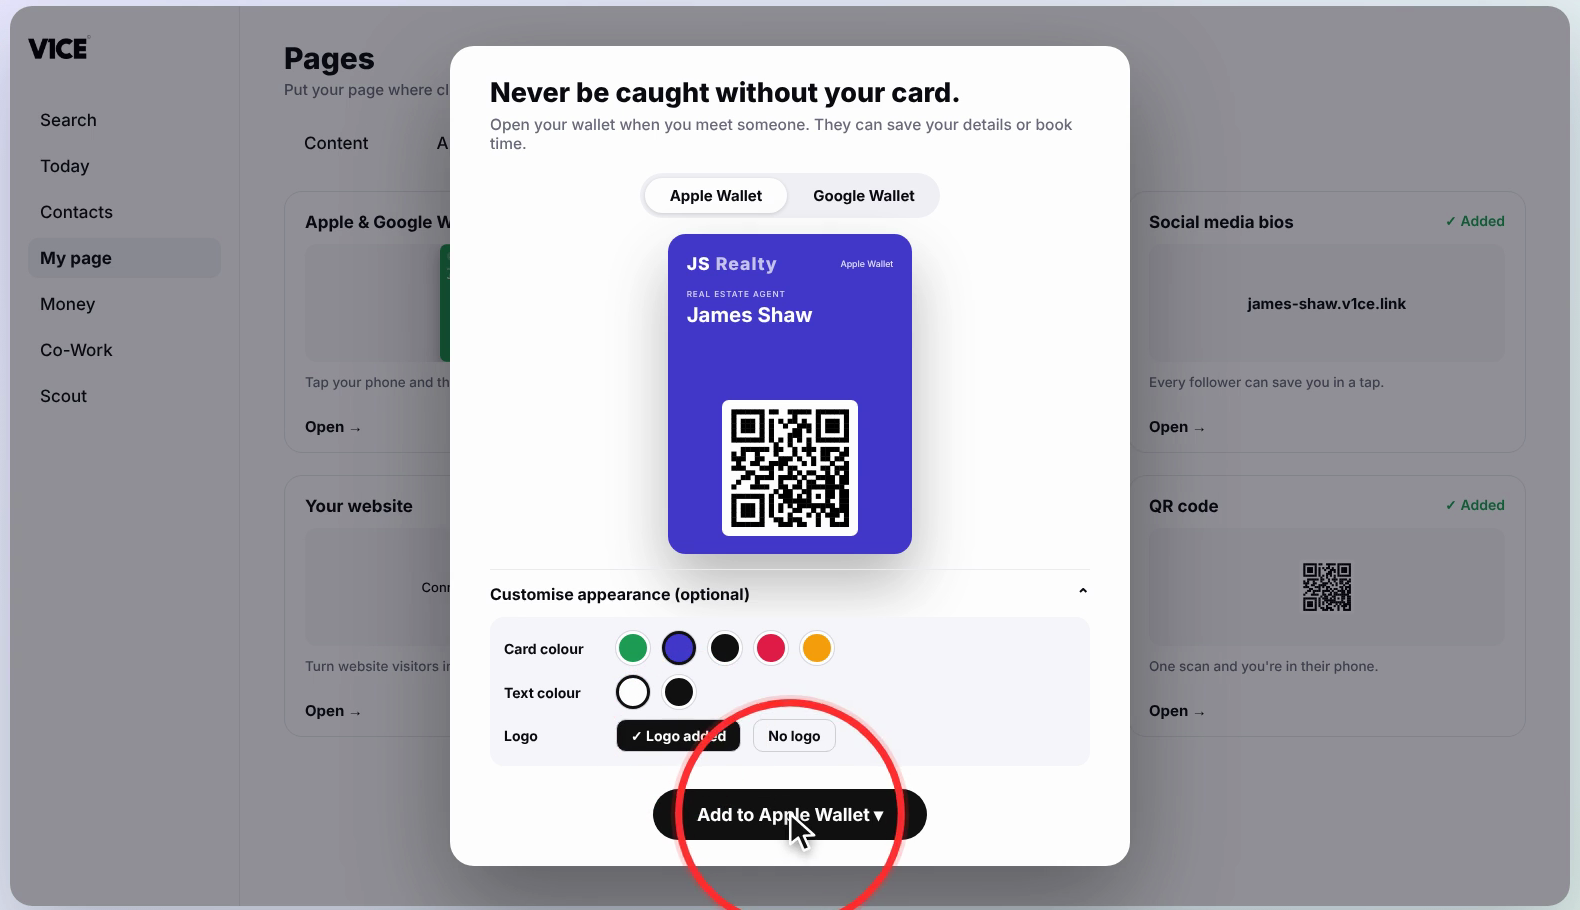
Step 7: Select Add to wallet
Select Add to Apple Wallet or Add to Google Wallet. A QR code appears.
Step 8: Get the QR code ready
Keep the QR code on screen so your phone can scan it.
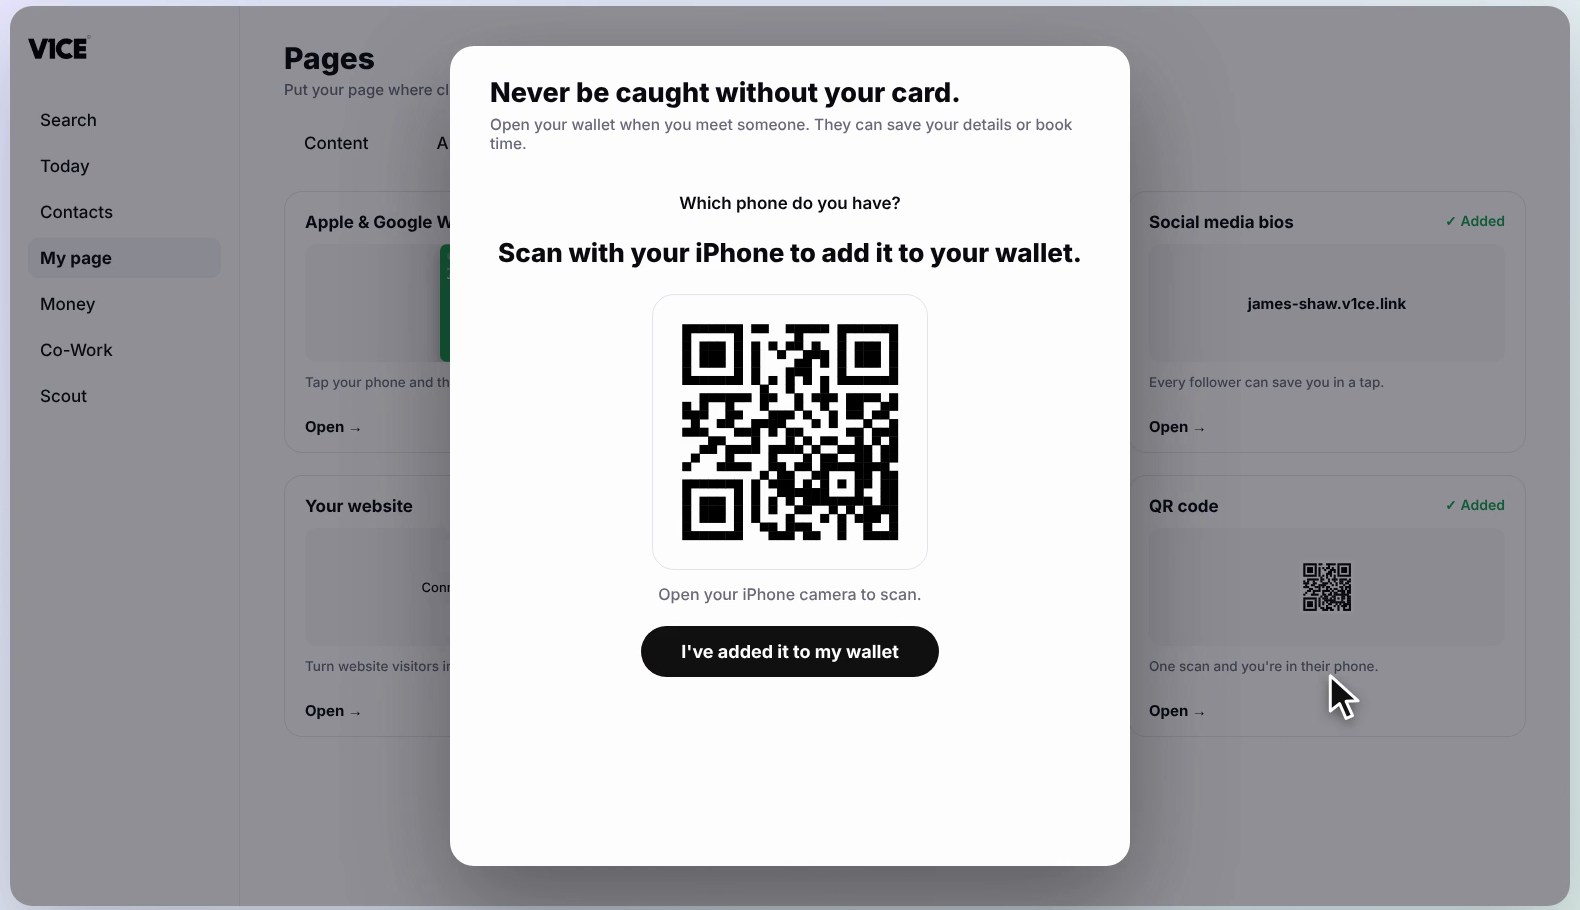
Step 9: Scan it with your phone
On your phone, open the camera and scan the code. Your pass appears.
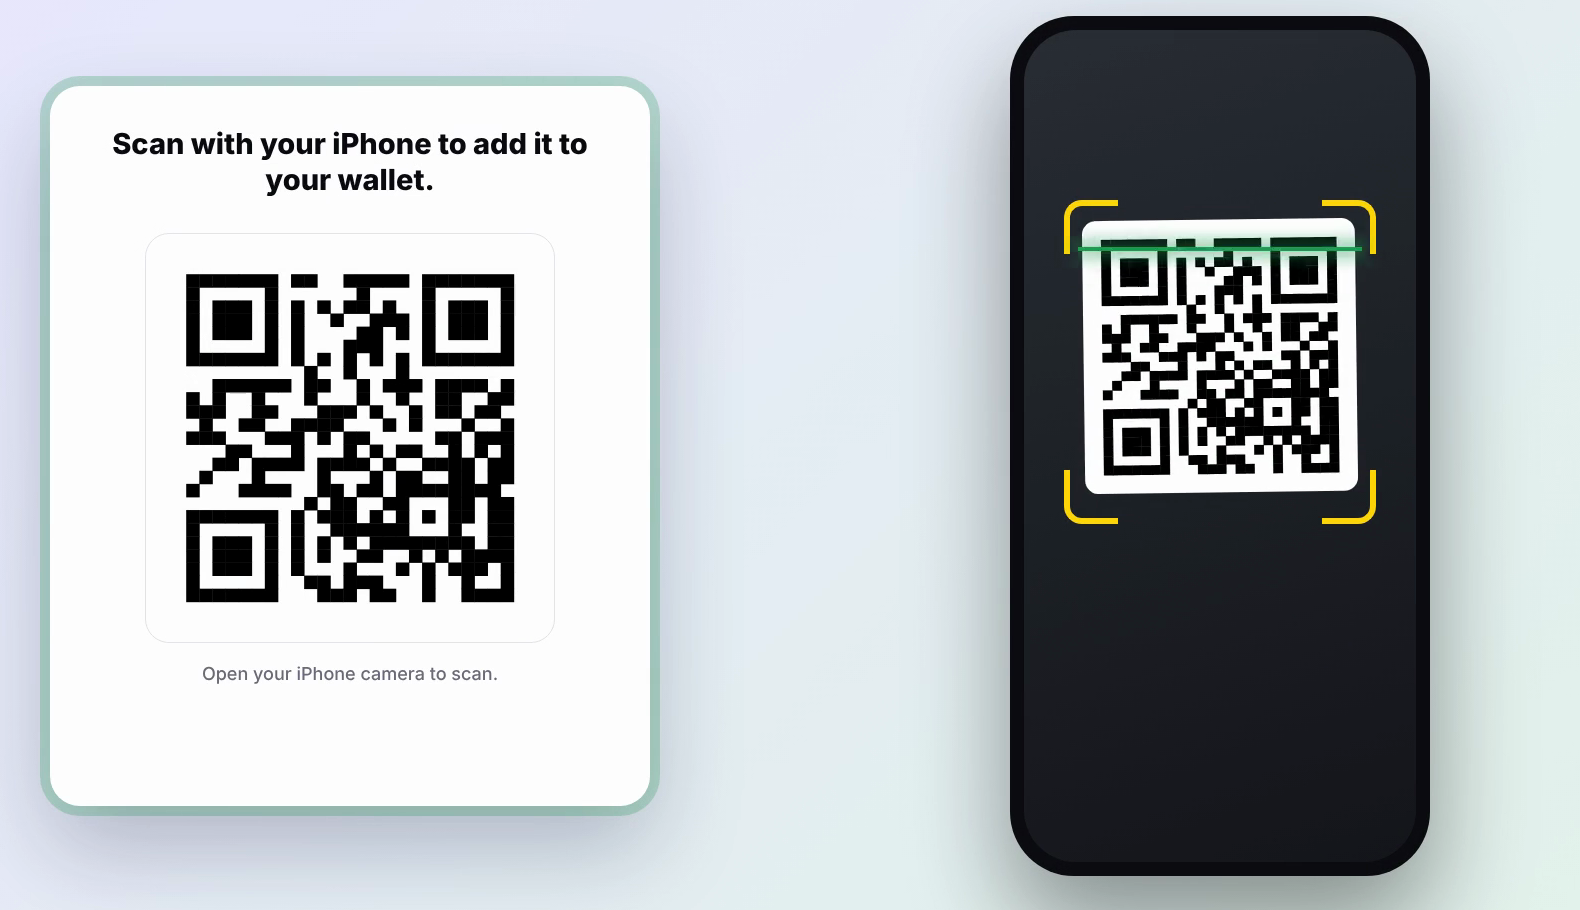
Step 10: Tap Add
Tap Add in the top right of the pass.
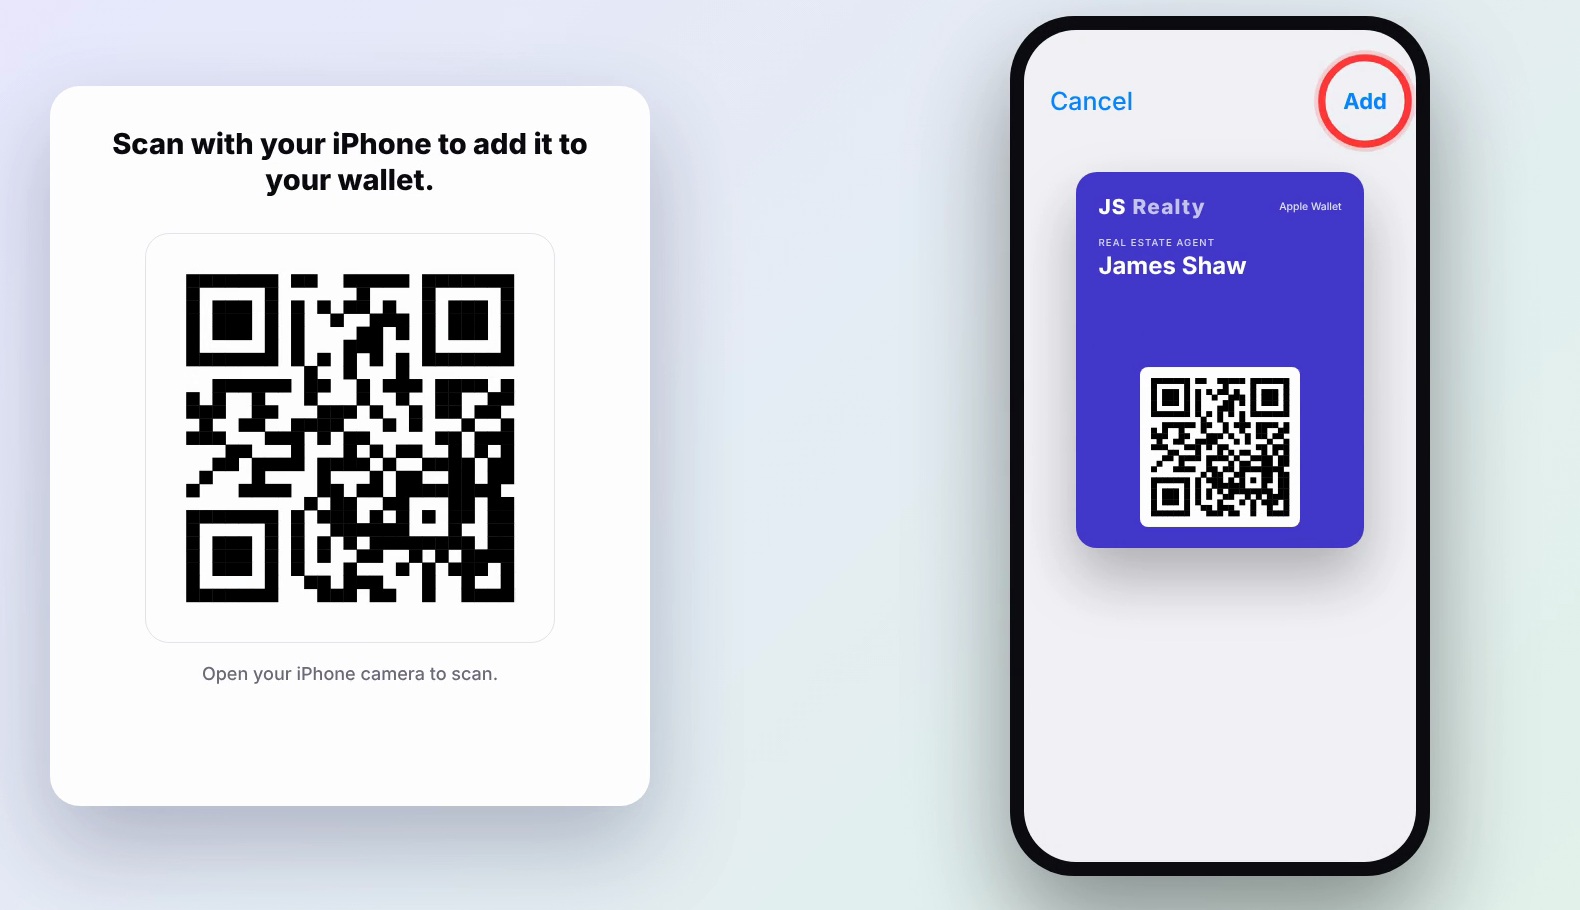
Step 11: See it in your wallet
Your card now sits in your wallet, ready to open whenever you meet someone.
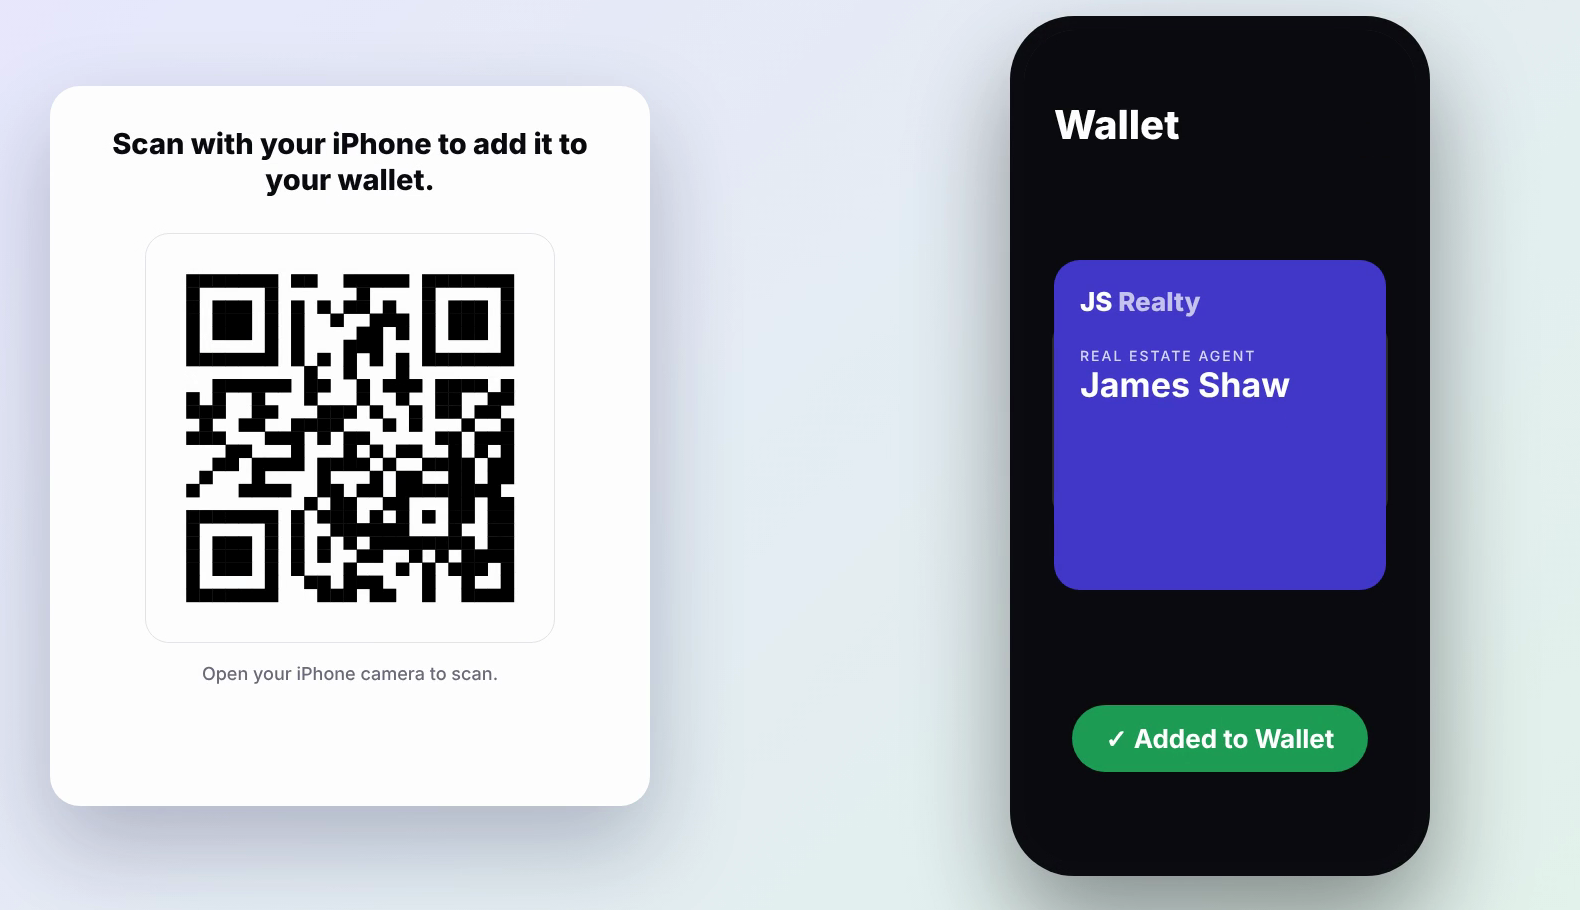
Step 12: You're ready
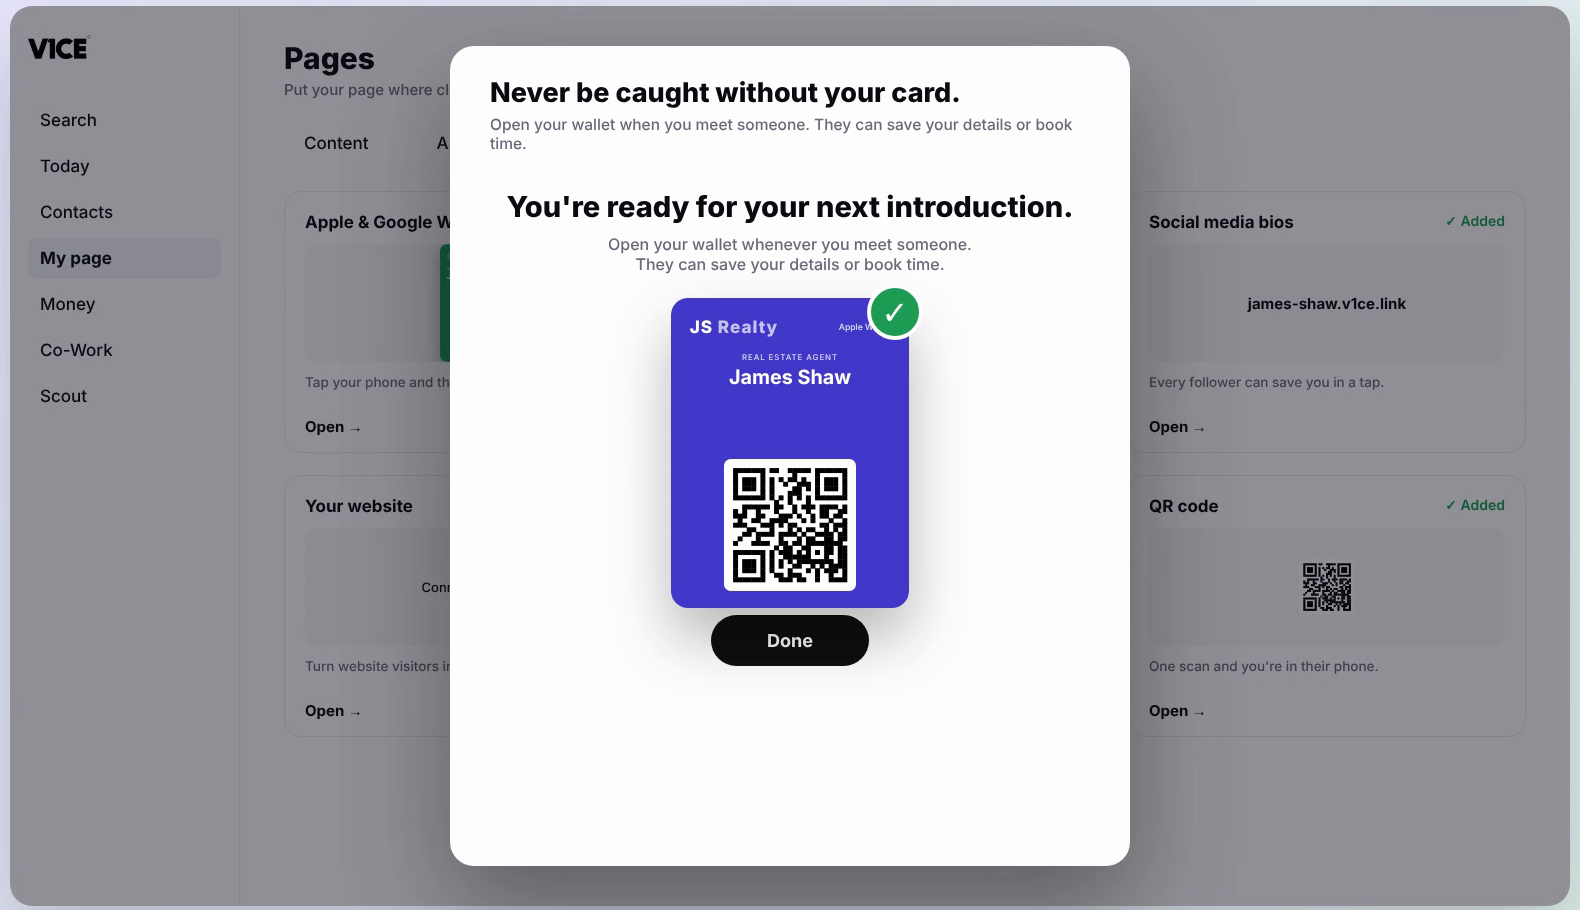
Back in V1CE you will see a confirmation. Select Done. Your card is live.
Good to know
- Choose Apple Wallet if you use an iPhone and Google Wallet if you use an Android phone.
- Your card is added once. After that, open your wallet whenever you want to share it.
- Every scan works both ways: you share your details and you get theirs.